Step by Step Guide on How to flash the ESP-01
So, you have bought your ESP-01 and are not sure if its pre-flashed or you need to do something with it, you may just want to make sure you have the latest firmware anyway. The best bet is to open your favourite programming software and try the module. If it’s not working at all or behaving weirdly then the chances are that you need to flash a new version of the firmware onto it. This is something that’s relatively easy but only when you know how and if you type it in a search engine there are lots of websites out there trying to get you to use weird versions of the ESP firmware so you need to be careful. I’ll go through what hardware to use to flash it, where to get the firmware and where to get the tool to upload the firmware to the chip.
The good news is that the tools and firmware are all free on the Espressif website but even then it’s not completely clear what to get and even the documentation provided isn’t too clear on what to do for beginners so I will go through it all here.
What hardware do I need?
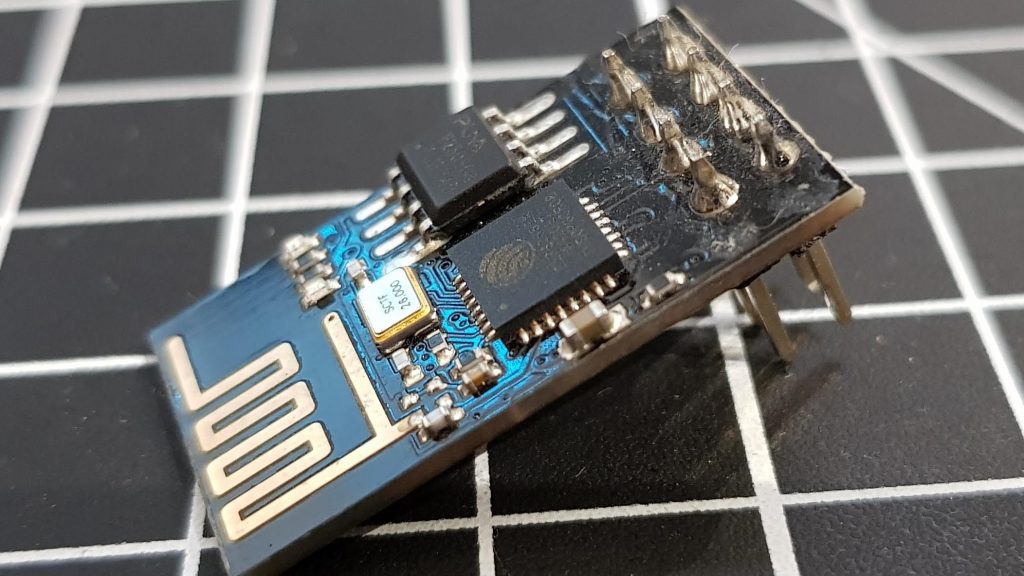
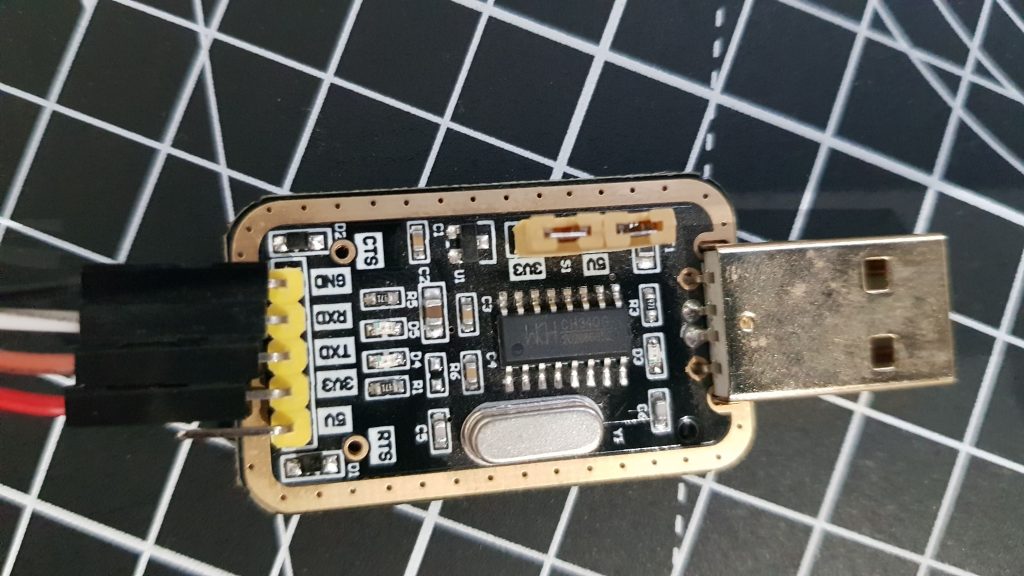
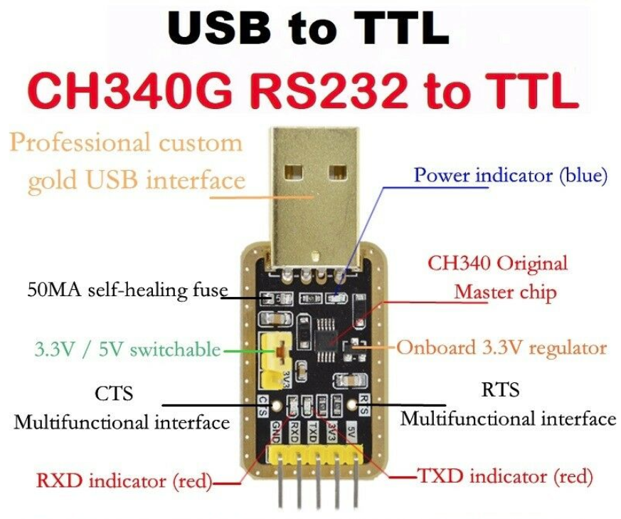
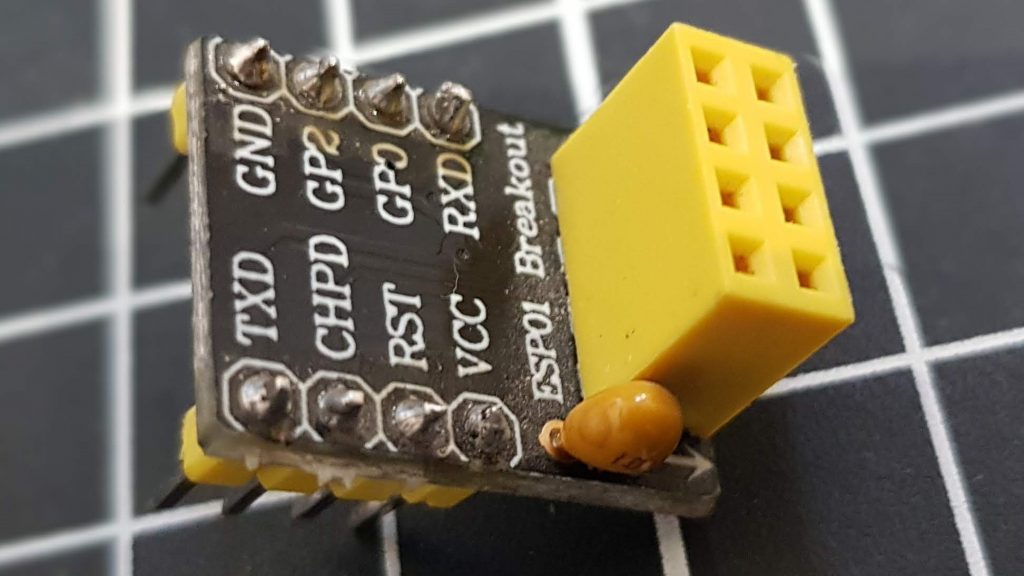
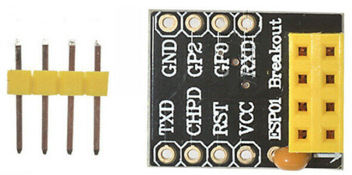
I put together a flashing circuit specially for this purpose and keep it set up on my breadboard so that it’s there when I need it. The two main odd looking items you will need are a USB-to-TTL converter so that you can plug in your USB port on your PC to upload the firmware and the ESP-01 has a weird pinout so I find its best to use an ESP-01 breakout board/adapter. Other than that, it’s just a couple of buttons and resistors. Here is the USB to TTL (sometimes called FTDI) converter I use, it’s a couple of pounds on your favourite electronics or auction site and has a 3.3v option which is ideal for the ESP-01 though there are plenty of other options out there:
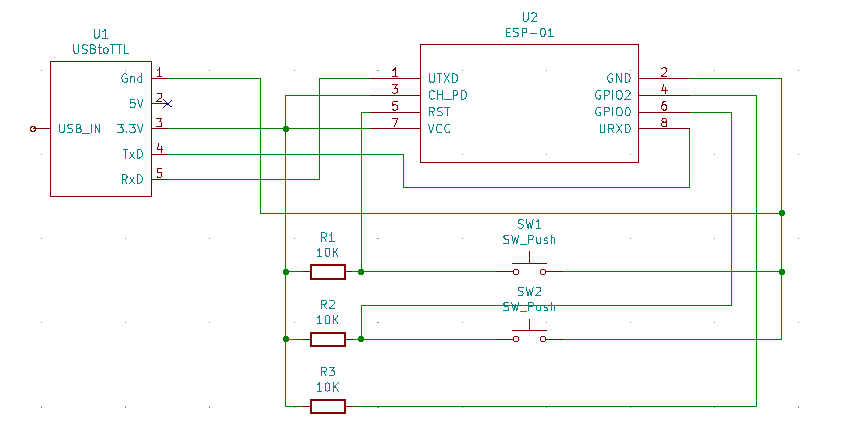
Here is the schematic:
And finally, here is a picture of it all setup on the breadboard:
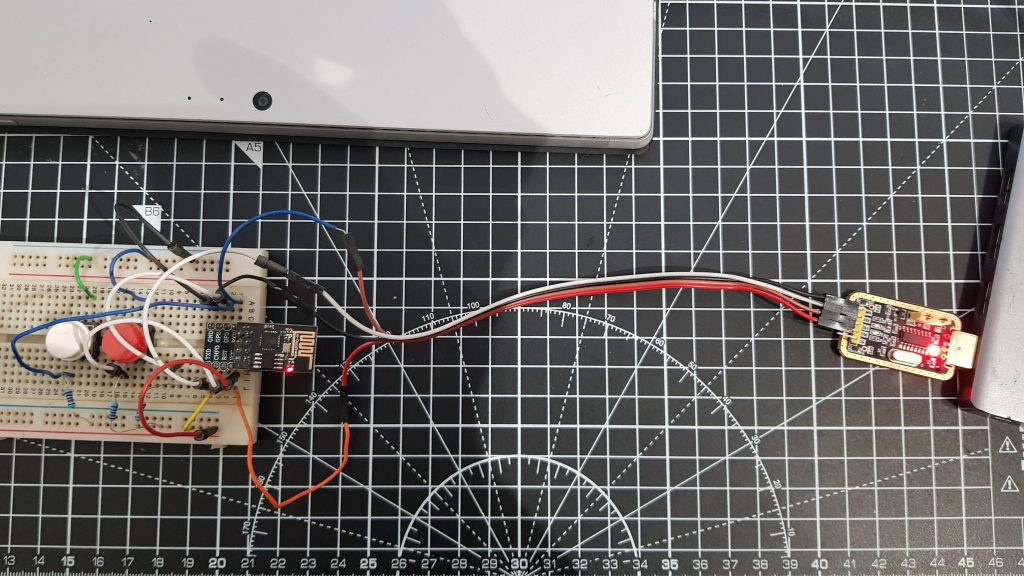
DON’T PLUG IT IN WITHOUT READING THE INSTRUCTIONS BELOW FIRST
What tool do I need to download to flash the ESP?
To flash the ESP-01 you need the Espressif Flash Download Tool which you can download for free from their website in the support -> download -> tools section. Link here:
https://www.espressif.com/en/support/download/other-tools

It’s not just for ESP-01, works for others too as you can see. Download that to a folder of your choice and unzip that file. Next you need to download the firmware files you are going to flash.
What firmware do I need and where do I get it?
There are lots of different firmware versions out there and they all have different functionality, some fix bugs and some improve performance. Obviously, some may induce bugs and decrease performance too, so I try to go for a stable version rather than the absolute latest issue. The firmware files can be downloaded individually or as part of a software development kit, I normally go for the software development kit as it has all the files that work together. You can download these again from the Espressif website in the support -> download -> SDK & Demos section. Link here:
https://www.espressif.com/en/support/download/sdks-demos

All of the stable versions should be shown, you can see the latest at the time of writing is ESP8266 NONOS SDK V3.0.0. Simply hit download and save it to a location on your computer, if it redirects to a github page then scroll down to the bottom and download the source code .zip file from there. Unzip the file and now you have all the things you need to flash the chip. All of the binary files you need to flash are in there, you may need to navigate around the files to locate all the ones you need but you should be able to find the following:
- blank.bin
- Location: ESP8266_NONOS_SDK-3.0.0\bin\blank.bin
- Flash Address: 0xFB000
- esp_init_data_default.bin
- Location: ESP8266_NONOS_SDK-3.0.0\bin\esp_init_data_defaultv08.bin
- Flash Address: 0xFC000
- blank.bin
- Location: ESP8266_NONOS_SDK-3.0.0\bin\blank.bin
- Flash Address: 0x7E000
- blank.bin
- Location: ESP8266_NONOS_SDK-3.0.0\bin\blank.bin
- Flash Address: 0xFE000
- boot_v1.6.bin
- Location: ESP8266_NONOS_SDK-3.0.0\bin\boot_v1.6.bin
- Flash Address: 0x00000
- user1.1024.new.2.bin
- Location: ESP8266_NONOS_SDK-3.0.0\bin\at\512+512\user1.1024.new.2.bin
- Flash Address: 0x01000
Flash the ESP-01!
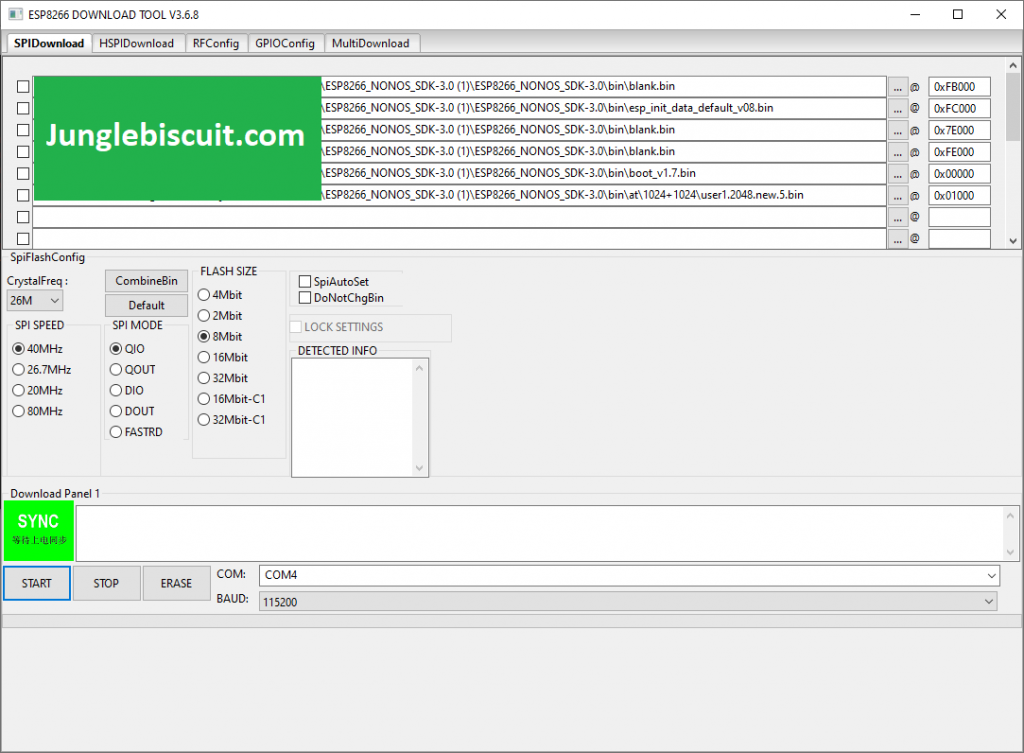
Now you have done all the groundwork to flash this thing its time to put it all together and do the job, exciting times! Open up the Espressif Flash Download Tool, you should be able to open the file straight from the folder you downloaded without having to install anything and it will open something like this:
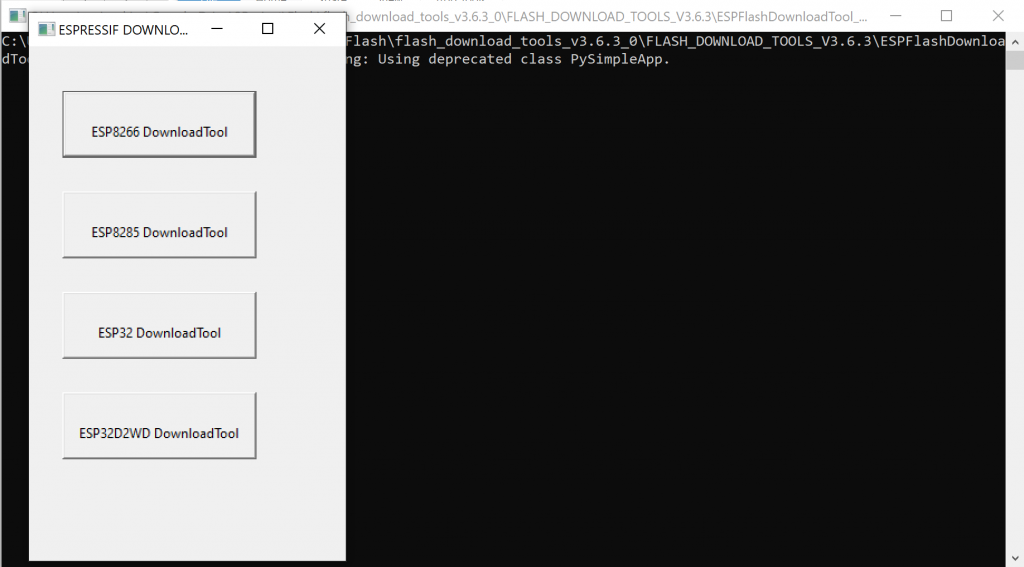
Click the top one for the ESP8266 Download Tool and it should open up this page:
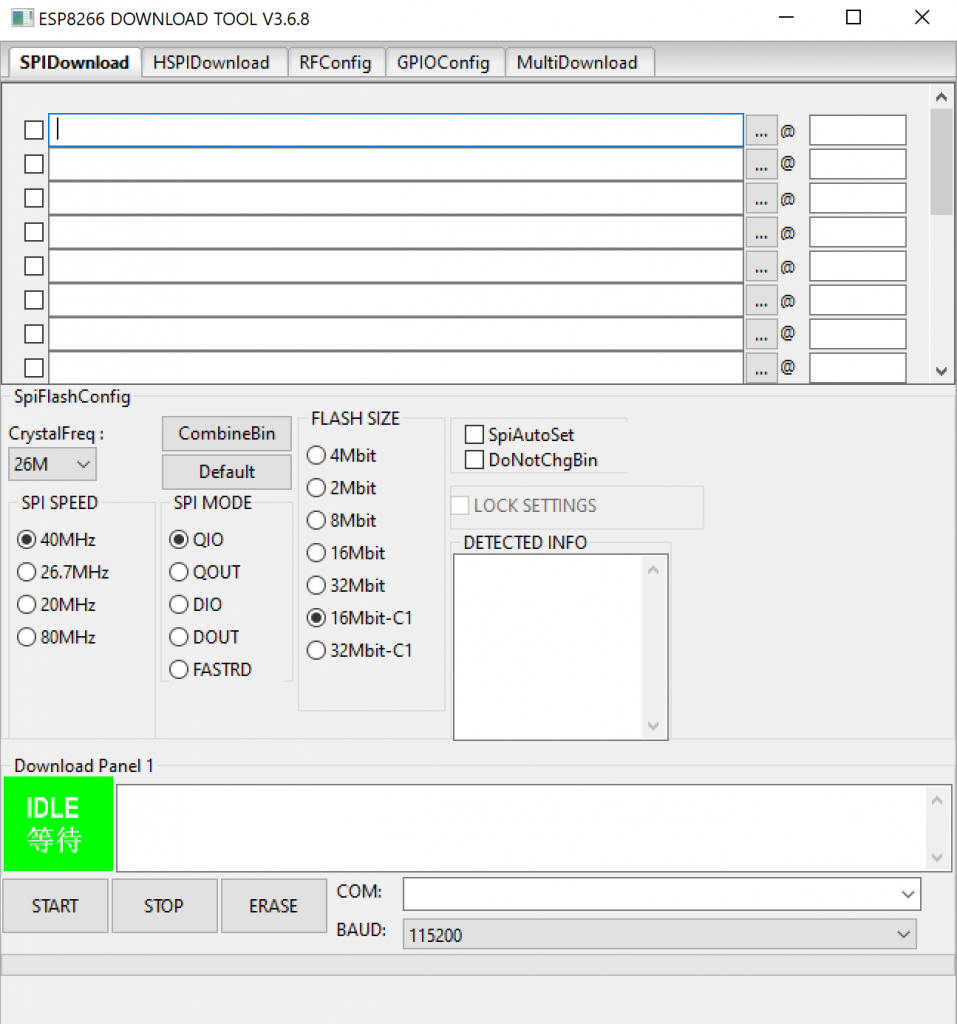
Some of those may be blank and you may have different boxes ticked, don’t worry, I’ll run through what to tick.
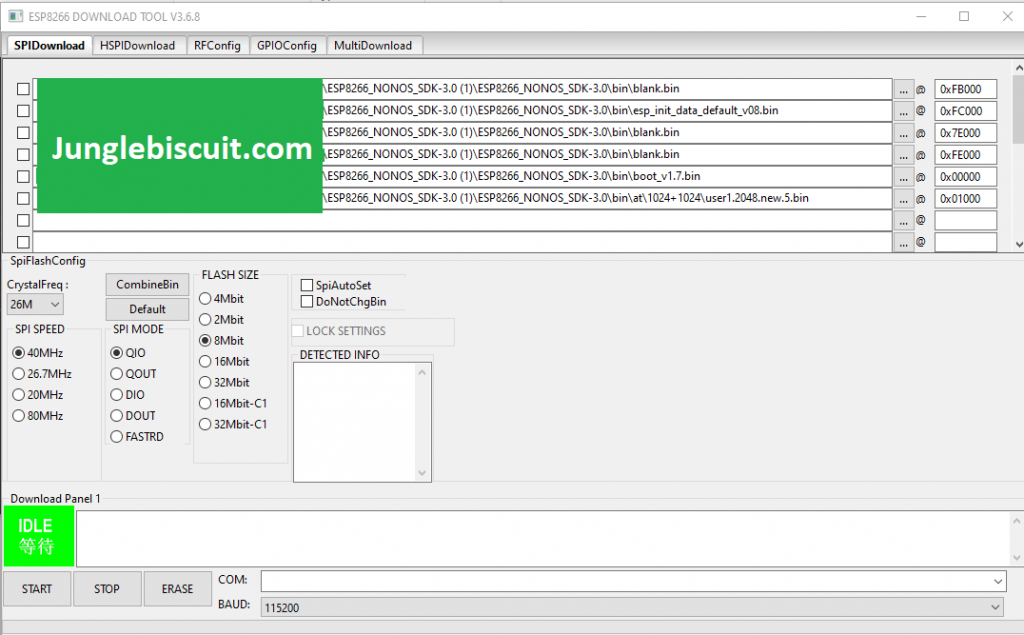
- Assign the binary files to the flash address as above.
- Pick CrystalFreq as 26M from the dropdown
- Click the SPI SPEED button 40MHz
- Click the SPI MODE button QIO.
- Click the FLASH SIZE radio button for 8Mbit.
So now it should look like this:
Ok now you are ready to plug in, when you plug the USB in you need to do the following to put the ESP into programming mode:
- Hold down the reset switch (SWI 1)
- Hold down the flash switch (SW 2)
- Release the reset switch (SWI 1)
- Release the flash switch (SWI 2)
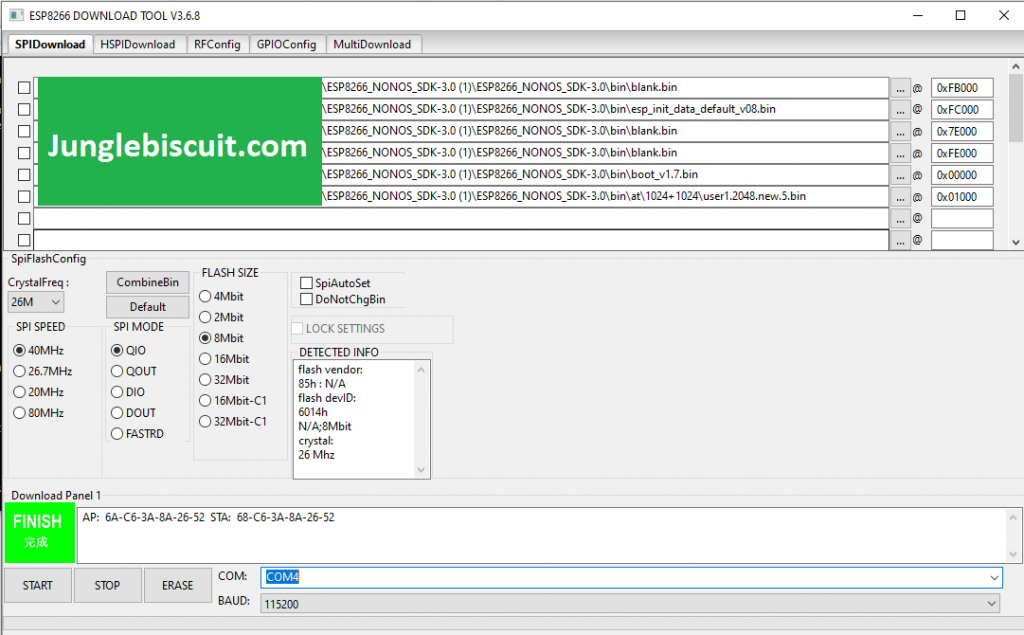
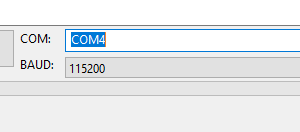
Make sure you select the COM port you are using from the drop down and set the baud rate to 115200:
Now just press start and it will sync then download then finish the flash!