Runescape – Castle Wars Guide

Introduction

Castle wars is a Runescape spin on the well known game Capture The Flag. The rules of the game are similar; to score a point you must capture the opponent’s flag in their base, and take it to your own base. The team with the most points at the end of the 20 minute long game wins.
Simple though it is, there are various tactics and hints that can help you win for your team. I will address these in my guide.

Equipment

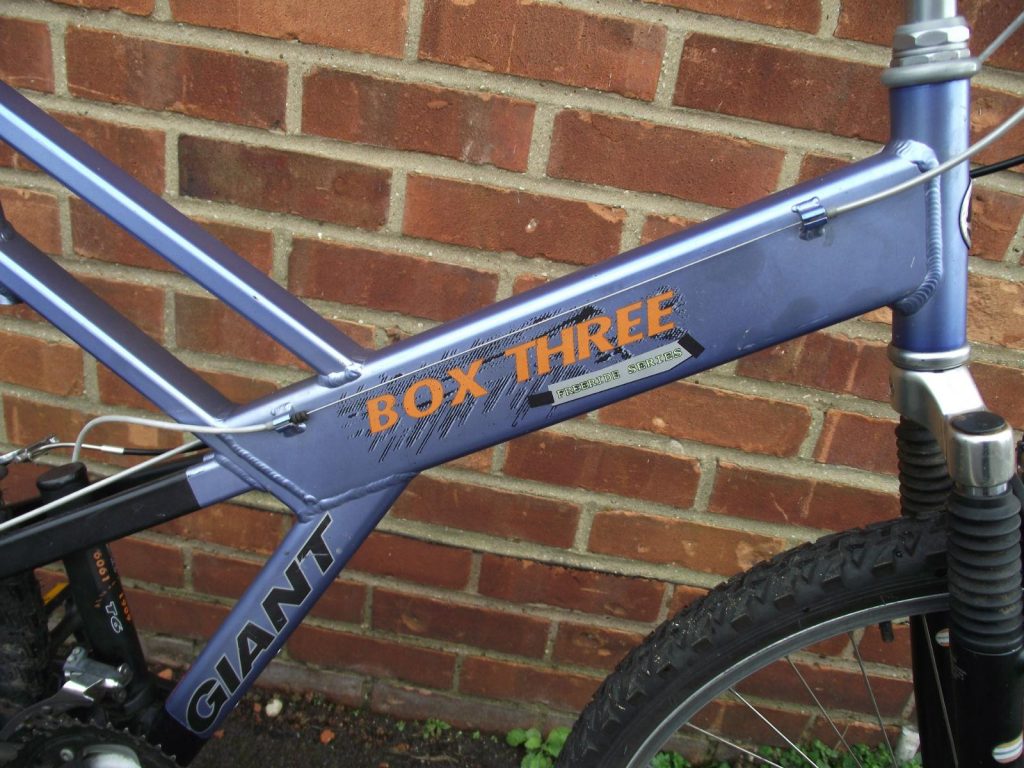
As far as equipment is concerned, I always try to bring at least 2 styles of combat when playing Castle Wars, if not 3. In Castle Wars capes and helms, and food are not allowed so that is why they are not present in my equipment guide. I’m going to assume that you are able to afford and wear rune and above items, if you aren’t then just wear the corresponding lower levelled items. I’ll also assume you can’t afford the new ancient armours (Torva/Pernix/Virtus), if you can then you won’t need this guide!
Top tip – bring Ava’s device from animal magnetism to Lanthus to receive the effects of Ava’s device during castle wars.

Gear – Melee

Castle Wars Melee Gear

Castle Wars Melee Invent

Gear & Invent – Melee

Weapon: Chaotic maul/CLS/CR>Godsword>Whip>Korasi>Dragon scimitar
Platebody: Barrows>Bandos>Dragon>Rune
Platelegs: Barrows>Bandos>Dragon>Rune
Shield: Dragon defender>Rune defender
Amulet: Fury>Glory>Power
Gloves: Best RFD gloves>Regeneration brace>Combat brace
Boots: Dragon>Rune (or infinity if mage defense is an issue)
Ring: Berserker>Warrior>Recoil
Ammo: Best you can afford for the corresponding weapon

Inventory

As extra items I like to bring a spec weapon, a ranging body for magic protection, a bow if you are binded, and a shield for tanking.

Spec weapon:
Defensive: SGS>Enhanced Excalibur>Excalibur
Offensive: Dragon claws>AGS>Korasi>Dragon dagger
Body: Karils>Arma (negative melee bonus)> D hide
Shield: Divine>Elysian>Chaotic shield>Spectral>DFS>Arcane>Blessed>Spirit shield>Rune kite
Bow: Chaotic crossbow>Rune crossbow>Crystal bow>Magic shortbow
Potions: Extreme melee>Super melee>melee potions
Pouch: The best you can use

Gear – Ranged

Castle Wars Range Gear

Castle Wars Range Invent

Gear & Invent – Range

Weapon: Chaotic crossbow>Rune crossbow> Crystal bow>Magic shortbow
Body: Armadyl>Karils>Dragonhide
Legs: Armadyl>Karils>Dragonhide
Shield: Divine>Elysian>Chaotic shield>Spectral>DFS>Arcane>Blessed>Spirit shield>Rune kite
Amulet: Fury>Glory>Power
Gloves: Best RFD gloves>Dragonhide vambraces
Boots: Ranger boots>Snakeskin
Ring: Archer>Recoil
Ammo: Best you can afford for the corresponding weapon

Inventory

In the inventory I like to bring some melee platelegs in case I am outnumbered by attackers, and I need to boost my defence, and I bring a spec weapon, potions and a familiar. You can also bring a few enchanted bolts to in your inventory to unleash devastating special attacks. If you bring a spec weapon with different ammo you will also need that type of ammo in your inventory.

Spec weapon:
Defence: SGS>Enhanced Excalibur>Excalibur
Offensive: Dark Bow>Magic shortbow
Platelegs: Barrows>Bandos>Dragon>Rune
Potions: Extreme ranged, defence>Super ranged, defence> Ranged, defence
Pouch: The best you can use

Gear – Magic

Castle Wars Mage Gear

Castle Wars Mage Invent

Gear & Invent – Mage

Weapon: Chaotic staff>Staff of light>Ancient staff (wands are good too but provide no damage boost)
Body: Ahrims>Battle robes (no set effect)>Infinity>Mystic
Legs: Ahrims>Battle robes (no set effect)>Infinity>Mystic
Shield: Divine>Elysian>Farseer shield>Arcane>Spectral>DFS>Blessed>Spirit shield>Rune kite (or zamorak book for magic attack bonus, though you will die more easily)
Amulet: Arcane stream>Fury>Glory>Power
Gloves: Best RFD gloves>Infinity>Mystic
Boots: Infinity>Mystic
Ring: Seers>Recoil
Ammo: Runes for your corresponding spell(s)

Inventory

As a mage I always bring melee armour, because magic robes are so weak. I also bring a melee weapon, because when in melee armour it is very difficult to not splash with magic attacks.
Spec weapon:
Defence: SGS>Enhanced Excalibur>Excalibur (or use staff of light, which is wielded)
Offensive: Melee weapons
Weapon: Chaotic maul/CLS/CR>Godsword>Whip>Korasi>Dragon scimitar
Platebody: Barrows>Bandos>Dragon>Rune
Platelegs: Barrows>Bandos>Dragon>Rune
Potions: Extreme defence>Super defence> defence (+ extreme magic potion if you want to boost damage, or normal magic potion if you want to your boost magic level for a spell)
Pouch: The best you can use (Wolpertinger gives a nice damage boost for magic)

Hybrid tactics

As I stated before, it is foolish to not bring 2 or more types of combat to castle wars, due to enemies using protection prayers and the variety of circumstances you will face. For example, ancient mages with ice spells are highly sought after to freeze opponents, most notably enemies holding a flag. Ancient mages are also capable of producing the best damage per second, however they have the most expensive supply cost. Rangers are very useful for killing mages and flag holders, and warriors are good all round players, their high defence armour gives them good resistance, and their weapons are very powerful against nearby rangers and mages.
Because of the use of all 3 types of combat in castle wars, I always bring 3 types of combat. Here is a typical setup I might use.

Castle Wars Hybrid Gear

Castle Wars Hybrid Invent

Gear & Invent – Hybrid

The equipment used is as stated in each individual class, but beware that you will not have enough space to bring boots/gloves/amulet/rings for each class when you hybrid, so you have to compromise. When using magic, it is best to always use magic boots and gloves, because the other types of boots and gloves have high negative bonuses to magic, whereas magic boots and gloves give no negative bonuses to the other classes. RFD gloves provide high bonuses to all classes, so for hybriding purposes, I strongly recommend them.

Tactics & Gameplay

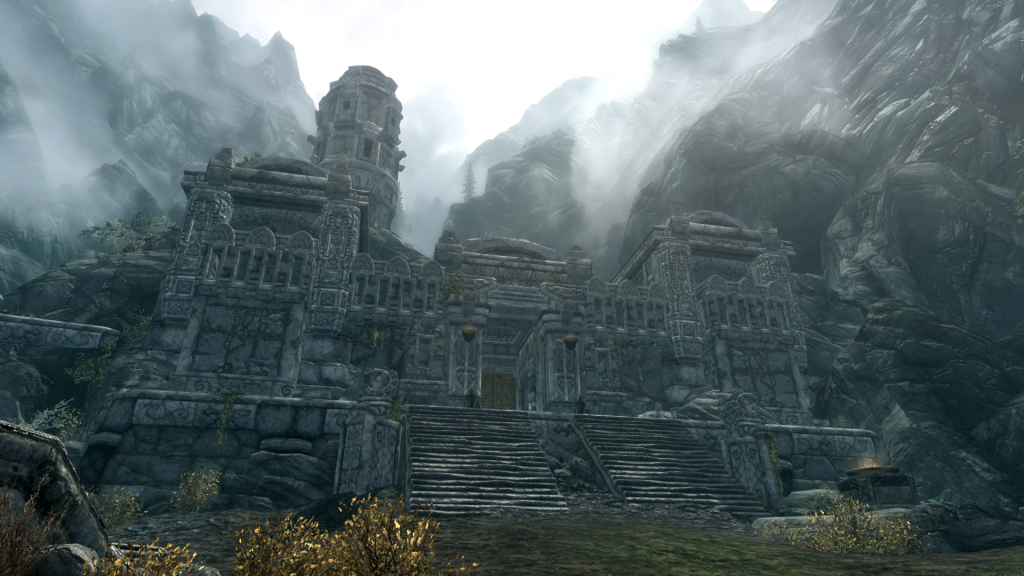
When you visit Castle Wars, you can enter the waiting lobby by choosing one of 3 portals, the red portal will put you on the zamorak team, the blue portal will put you on the saradomin team, and the green portal will put you on the team with the least players. Personally I would not recommend the green portal, as it increases the chance of you losing the game, so unless rewards aren’t important to you, you should go to the red and blue portals, scout each one for the best players, and join the team with the highest levelled players. This can improve your chances of winning.
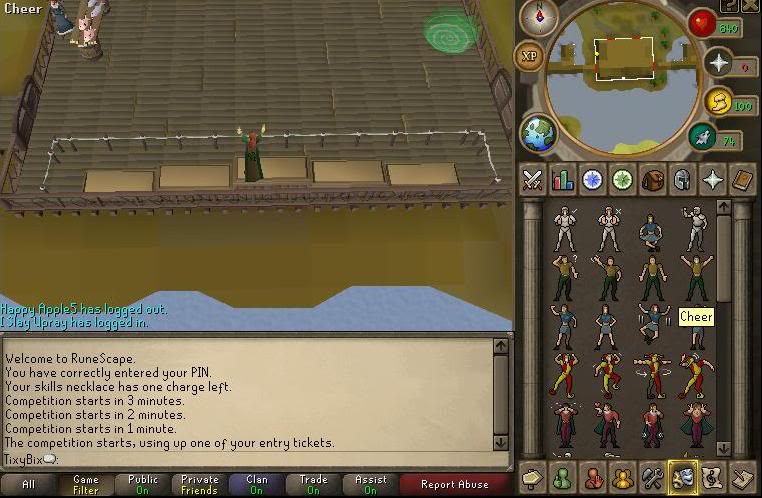
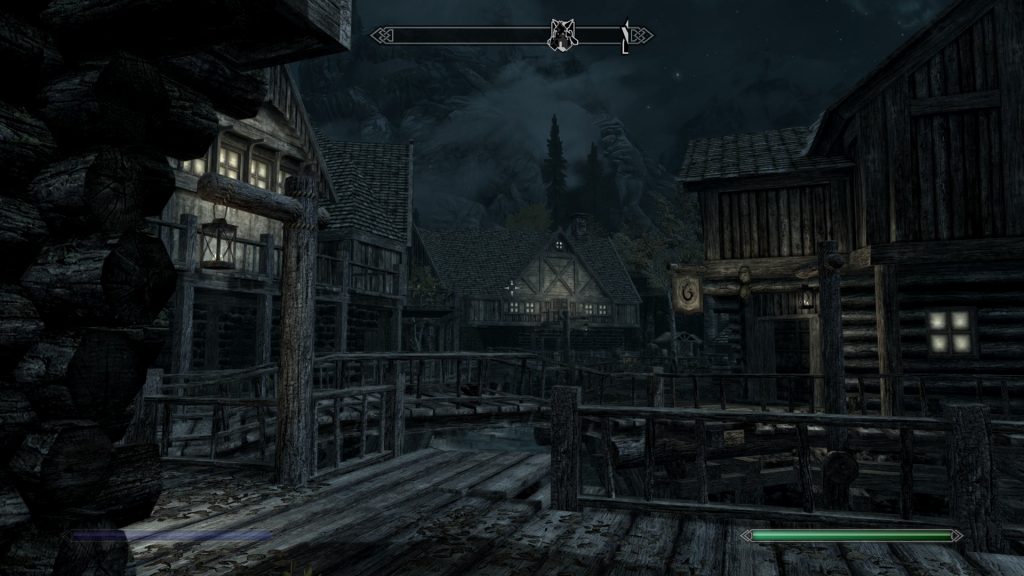
When you enter a lobby, you will be presented by a timer which tells you how long you have to wait until the next game. As there are 5 minutes between consecutive games, you will see most of the players run in when the timer reaches 5 minutes. If you wear certain god items, you will be transformed into a type of animal whilst you are in the lobby.

Castle Wars Waiting to Start

Castle Wars – waiting to start

As well as the general multicombat style of fighting in Castle Wars which is found throughout Runescape, there are also specialised tactics which can be used in Castle Wars. When starting the game there are a variety of items you can use to aid your combat. These have unlimited stock, but your inventory is not unlimited, so you have to manage your space. A very common tactic in Castle Wars is to take enough bandages at the beginning of the game to fill your inventory, and then rinse and repeat when you die. At this point I should probably point out that this is a SAFE mini game, and you will re spawn in your base when you die, and you will keep all of your items.

The other equipment available for pickup includes catapult ammo, explosive potions to destroy rocks underground, pickaxes to cause rock falls underground, barricades to stop people from moving in a certain direction (these can be attacked and destroyed), tinderboxes to burn barricades, flares to direct catapult attacks, ropes to climb up the battlements, and repair kits to repair the front gates of the castle. Repair kits are much neglected; I have never seen someone use one.

On the top of the battlements, there are catapults which can be used by anyone, provided that they pick up some catapult ammo from the tables on the ground floor of the base. The catapults are a great way to get your own back on high levels if you are a low level, because any player can use them, and they are extremely powerful, if slightly annoying. The catapult shots can fire anywhere except for the enemies base, and have a very high radius of impact. Because they can’t reach the enemies base, a usual target for shots is the island in the middle, so you should be careful when you are on the middle island.

Castle Wars Catapult

Castle Wars Catapult

The battlements are a good place for rangers and mages to attack other players invading their base, as it offers protection from warriors, and almost all castle wars players are warriors.

Castle Wars Battlements

Castle Wars Battlements

In Castle Wars there are 3 basic player types, those that defend their castle, those that attack the other castle, and those that run to the middle and attack other players (most players do this). As a defender, it is your job to stop all enemy players from taking the flag. The best strategy for this is to place barricades along the top floors to slow enemies. It is also very helpful to have an ancient mage to freeze enemies going for the flag. You should fill your inventory with barricades to replace those that get destroyed when you are defending.

When attacking, the most important thing to remember is defence. You will need substantial magic defence to stop yourself being frozen, but you will also need good melee defence or you will be killed in seconds. A typical tactic employed by players is to equip mage defence gear, eg armadyl, karils, dragonhide, and use protect from melee with a defence potion to block melee attacks. A few useful tips for improving magic defence are:

1.Equip a staff, all staves have good magic defence
2.If you can afford it, use a spectral spirit shield, this gives the best magic defence bonus, with a great melee defence bonus too.
3.Invest in an amulet of fury; it gives great all round defence bonuses.

I would not recommend trying to capture the flag with 70 or lower defence, such an attempt is very unlikely to bear fruit. On reaching the enemy based, a very common situation is to be faced with a large number of barricades, and to die trying to clear your path. Because of this, you should plan an assault with other players so that the damage is spread between all of the attacking players, and so that the barricades can be cleared more effectively.

Castle Wars Barricades

Castle Wars Barricades

If you plan on playing as a ‘run to the middle’ player like most players (and me), then there are still tactics to apply to certain situations. If you meet a magic user, a great way to annoy them is to use the special attack of the seercull bow, which reduces their magic level by 1/10 of the damage you hit. This is especially effective against ice barrage users, who will be unable to use ice barrage if you hit above 55, and because they are unlikely to be carrying chaos runes, they will be unable to use ice burst instead.

If you want to try a more efficient way of killing, you could try to assemble all of your team players in a clan chat (or better, bring your clan!), and give them directions. Piling enemies will see them die much faster, and result in less opponents attacking you at a time.

When you see an enemy running with a flag, a useful tactic is to attack them with the dragon spear/zamorakian spear special attack to stun them for a couple of seconds. This can be very valuable when they are in high magic defence gear and they are not being frozen.

Sometimes when an enemy flag runner holding your flag dies, one of your team members might manage to take the flag, and another tactic known as flag holding comes in play. If your team holds your flag, then in order for your opponents to score, they will have to kill that team member and take the flag off them.

Various tactics can be utilised to ensure this doesn’t happen, if your team is in the lead, then your team should guard the flag holder, and set up barricades around them. It is beneficial for the flag holder to have use magic attacks, because when holding the flag you can only attack with the flag, which is very weak, or use magic. With enough ancient mages, barricades, and attackers, you can guarantee your team a victory by flag holding.

Rewards

Castle Wars Rewards Shop - Decorative Armour

Castle Wars Rewards Shop - Consumables

Castle Wars Rewards Shop - Miscellaneous

Castle Wars Rewards Shop

Various rewards can be bought with the use of Castle Wars tickets, which are gained by winning or drawing a game, 2 tickets for a win and 1 ticket for a draw. The most obvious choice is the Castle Wars armour, which can be mounted in the skills hall of a POH, or worn in Castle Wars to great effect. The lowest levelled armour gives a 10% damage boost inside Castle Wars, this increases by 5% per set, but the armour sets only have a defence bonus comparable to steel, mithril, adamant, and rune respectively. You only need to wear the body, platelegs and shield to gain the set effect.

You can buy parts of a ballista with tickets, but in my experience the catapult is far more powerful than the ballista, so it’s somewhat a waste of tickets. You can buy potion sets for tickets, but these potions can only be used inside a game of Castle Wars, so they are useful if you have a low number of tickets floating around and nothing else to buy. I wouldn’t buy them unless you have serious money making problems, because much more money can be made by money making, buying potions, and then playing Castle Wars.

You can also buy decorative capes and hoods to show off your Castle Wars achievements, or you can buy the new halos or faithful shield. The halos each reduce the drain rate of certain prayers. Guthix reduces the rate of attack prayers, Saradomin reduces the rate of defence prayers, and Zamorak reduces the rate of strength prayers. I personally can’t find much use for these, because they don’t work for protection prayers, and in most situations I would prefer a helmet with strength or defence bonus. I currently own the faithful shield, which gives a nice +6 prayer bonus with stats comparable to a rune kite, and looks very nice, sporting the new particle effects recently added to Runescape.

Runescape – Guide To Hunting The Giant Mole

1. Gearing up

Giant Mole Gearing Up

Giant Mole Gearing Up

2. How to get there

The Giant mole is found in the Falador Mole Lair, just under Falador Park. The player will need a spade to get there and a light source to see. The mole lair is a Multicombat area, so teams of players can easily coordinate their activities to slay giant moles.

Use a spade to dig on one of the mole hills in falador park:

3. Inventory

-SPADE
-LIGHT SOURCE
-TINDERBOX
-Falador Elite Shield.
-Special Weapon (DDS + Claws > DDS + Dragon Halberd > …)
-Teleport runes to falador and lumbridge.
-Combat pots.
-Prayer pots and food if you are not using the teleport method.
-Pouches
-Cannon + cannonballs
-Tireless run scrolls > Energy pots > Boots of lightness+Spottier cape

4. Summoning

Offensive familiars that are attacking the giant mole will walk towards the mole when it runs away from you, and give you a general direction of where the mole’s new location is.

Terrorbirds can restore your energy using Tireless Run scrolls.

5. Prayer

Always pray piety/turmoil and protect from melee, after killing the mole it won’t respawn for 2 minutes. Enough time teleport to lumbridge (or anything else close to an altar), pray and teleport back to falador.

6. Gear

Helm: Neitz > Verac
Chest: Bandos > Torso > Proselyte > Verac
Legs: Bandos > Proselyte
Cape : Fire Cape > Soul Wars > Skill Cape > Spottier Cape
Boots : Dragon > Boots of lightness
Gloves: Barrows
Ring : Berserker (i) > Berserker > Wealth

Shield : Rune defender > DFS
Weapon: Chaotic Rapier > Chaotic Long > Zamorak Spear > Godsword > Whip.
Special: DDS + Claws > DDS + Dragon Hally

7. How to kill it

The Giant mole will always spawn in the middle of the lair. Set up your cannon there. Equip your Dragon Dagger (S) and do specials to poison it.

Killing The Giant Mole

Killing The Giant Mole

At half health and under, the giant mole starts digging around the cavern to escape. There are several different locations that the mole can resurface around the cave. These are the resurfacing locations. There is one in the centre, one in the top left of the cave, one in the top right, one on the hill, one below the hill, 2 on the far right of the cave and one in the centre.

When it burrows, it raised a huge cloud of dust than can extinguish an unprotected light source, always bring a tinderbox! Covered light sources such as the Bullseye lantern and Candle lantern are not affected.

An excellent way to fight the mole is to be able to run almost constantly. The mole lair is quite large, so run energy is easily depleted once the mole starts burrowing. A terrorbird can be very helpful, energy pots or even Oo’glogs Energy Pool help too. Falador Elite Shields can be operated to find the mole easily.

The value of teams, especially larger ones, is that team members can stay at locations where the mole can surface after burrowing away, allowing the team to spread out and find the mole again very quickly.
After killing the mole it won’t respawn for a good two minutes. Quickly teleport to lumbridge, pray at the altar and tele back to falador for cheap prayer points. The mole will always respawn in the centre.

8. Rewards

The mole will always drop Mole claws and multiple Mole skins, each of which Wyson the gardener (in Falador park) will exchange for Bird’s nests. Bird’s nests can contain valuable Seeds and other items and, when crushed, become Crushed nests, a valuable item that is often highly in demand by players training Herblore.

The mole drops 2 charms at a time.

Other drops: Blood, Law, Nature and Death runes. Various rune weapons. Rune Kiteshield. Rune Square Shield. All gems. Rune bar. Up to 100 noted yew logs.

Clues: Hard and elite.

Effigies: Yes.

How To Repair The Digihome DTR80 80GB Freeview Recorder (stuck on starting)

Had a few problems with this and it hadn’t been working for a while. Nothing came on the TV and the little display on the device itself was stuck on “starting”.

I have found a solution so thought I would post it here 🙂

Open the six screws on the outer case and then pull it up and off to get access to the hard drive. Turn the device over and undo the four screws that are holding the harddrive to the case. Remove the harddrive power and data connection cables.

Plug the hard drive into a pc – note that the hard drive will not show up like a normal hard drive does. Also note that you do not need to change the jumper settings on the drive itself normally.

Go to control panel then “administrative tools” (sometimes in system and maintenance category). Go to “computer management” and click on “disk management”. Find the hard drive – your pc probably won’t have assigned a drive letter to it so it will be the one without any. Right click on and delete both of the partitions on the drive. Now right click it again and format it – make sure the file system is NTFS.

Once it is done take the device out of the pc and put it back into the DTR80 case. Plug in the harddrive cables and the screws etc as above. Now when you re-connect the device to your tv and turn it on you will get a message saying “this device requires a format, do you want to perform this now”. Use the controller to select “yes”. Give it a few minutes until the timer is displayed on the front and then press the “on” button on your controller. Job done!

If the device is working fully and you want to format it for any other reason there is an easier way to do it – go to the menus and setup – recordings page then select format disk.

Skyrim Gameplay Screenshots

Skyrim Screenshot Watermill
Skyrim Screenshot Town at Night
Skyrim Screenshot Evil Horse Red Eyes at Night
Skyrim Screenshot In The Sewers
Skyrim Screenshot Dragon Ice Breath
Skyrim Screenshot Ghast
Skyrim Screenshot River
Skyrim Screenshot Axe Chopping Block
Skyrim Screenshot Town at Night
Skyrim Screenshot Dead Bear
Skyrim Screenshot Sneaking Thief or Ranger
Skyrim Screenshot Open World Campsite
Skyrim Screenshot Fighting an Enemy
Skyrim Screenshot Dragon Fire Breath
Skyrim Screenshot Dragon Flying
Skyrim Screenshot Icy Cave
Skyrim Screenshot Under Attack
Skyrim Screenshot Town On a Nice Day
Skyrim Screenshot Night Time Weather Effects
Skyrim Screenshot Some Strange Eggs
Skyrim Screenshot Blood Dragon on a Building
Skyrim Screenshot Dragon Death
Skyrim Screenshot Arrow Through The Head
Skyrim Screenshot Archer
Skyrim Screenshot Dragon in the Night
Skyrim Screenshot Cool Night Effects
Skyrim Screenshot Angry Ladies
Skyrim Screenshot Lightning Spell
Skyrim Screenshot Night Sky
Skyrim Screenshot The Mountain
Skyrim Screenshot Sky Effect
Skyrim Screenshot Big Hall With Guard
Skyrim Screenshot Big Hall
Skyrim Screenshot Words of Power
Skyrim Screenshot Portal In the Sky
Skyrim Screenshot Guardian Torsten
Skyrim Screenshot Good View
Skyrim Screenshot A View of the Mountains from the Keep
Skyrim Screenshot In the Cave
Skyrim Screenshot Blood Moon
Skyrim Screenshot At The Bar
Skyrim Screenshot Learning a Word of Power
Skyrim Screenshot Bone Hut
Skyrim Screenshot Treasure in the Spiders Web Nest
Skyrim Screenshot Enemy Sighted
Skyrim Screenshot Adventurers Ready
Skyrim Screenshot Stars at Night
Skyrim Screenshot Nord Boat
Skyrim Screenshot Killing a Walrus
Skyrim Screenshot Finish Him
Skyrim Screenshot Posing by the Mountain
Skyrim Screenshot Control That Horse
Skyrim Screenshot Fancy Indoor Gear
Skyrim Screenshot Dragon Landing and Flying
Skyrim Screenshot Fighting Against Bandits
Skyrim Screenshot High Definition Graphics Max View Distance
Skyrim Screenshot Eagle Rock Camp
Skyrim Screenshot Getting a Boat Across The Lake
Skyrim Screenshot Bitten By a Mudcrab
Skyrim Screenshot Mountain View Cloudy Bright Sky
Skyrim Screenshot Forest Inside a Cave Pockets of Light
Skyrim Screenshot Snowing On Approach
Skyrim Screenshot Inspecting The Fallen Dragon
Skyrim Screenshot Fire Atronach Standing On The Entrance To The Mages Guild
Skyrim Screenshot Fighting a Draugr
Skyrim Screenshot Skybox Aurora Borealis Night Sky
Skyrim Screenshot Loading The Horse and Cart
Skyrim Screenshot Sitting on The Throne
Skyrim Gameplay Screenshots - Markarth City Entrance
Skyrim Gameplay Screenshots – Markarth City Entrance

Skyrim Screenshots

Giant Box One Freeride Series Full Suspension Downhill Mountain Bike Information

INTRODUCTION

I was given one of these bikes many years ago for christmas (1997), it has served me well over the years and I was shocked to see that the internet is pretty empty when it comes to providing information on this fine machine. I am going to dedicate this page to compiling facts and specs from the original design. I have also collected some pictures in the gallery at the end of the page. The 1998 version was blue/yellow with Magura hydraulic rim brakes and RST front dampers. The 1999 version was red/black with diatech disc brakes and Suntour front forks.

Edit: Due to popularity of this post I have also added the Box Two, Box Three and Box Shock specs and images, please do let me know via the comments if you have additional information or spot any errors.

FRAME

Firstly it was sold in the standard frame sizes Giant full suspension bikes are sold in these days.
-Size
-Measurement
-Approx height range

-Small
-16.5”
-5ft 3 – 5ft 6

-Medium
-18.5”
-5ft 6 – 5ft 11

-Large
-20.5”
-5ft 11 – 6ft 2

-XL
-Normally Giant have XL as 22.5” frame but I believe this series XL is 21.5″.
-6ft 2 plus

The most common is the 18.5″.

Made from alloy, none of this aluminium/carbon malarkey you get now days 😛
6061 T6 Aluminium

ORIGINAL SPECS

Blue box one:

Model: Giant Box One ’98 Freeride series, blue – yellow
Frame: 6061 T6 Aluminium 21.5 inch, full suspension, V form
Shifters: SRAM ESP 7.0, 3×9 gripshift gears
Derailleur: SRAM ESP 5.0, 3×9 front and rear derailers
Suspension:
Front: RST 381DH, oversized
Rear: Giant GTM 7 fully adjustable rear shock
Brakes: Magura HS11 special – hydraulic rim brakes

Red box one:

Model: Giant Box One ’99 Freeride series, red – black
Frame: 18.5 6061 t6 alloy frame
Shifters: SRAM ESP 7.0, 3×9 gripshift gears
Derailleur: SRAM ESP 7.0, 3×9 front and rear derailers
Suspension:
Front: Sr Suntour dc90 magnesium triple clamp adjustable forks
Rear: Giant GTM 7 fully adjustable rear shock
Brakes: diatech dp9 pro disc brakes with anodised calipers
Others:
– quick release alex al-dv22 double wall rims with giant hubs
– tioga factory downhill 2.10f tyres
– 24 speed
– sr suntour xr32 crank
– vp 565 peddles
– selle italia karve seat
– giant quick release alloy seat post
– ntg a-head set
– giant stem and bars

Dark Grey/Silver/Blue box two:

I’ve been sent a picture of a Box Two frame (in gallery below). It may be from 1998, but cannot find a lot of info. Giant also sold these as “Warps”. The one in the image is a 21.5″ frame.

Gold/Yellow/Pink box two:

Model: Giant Box Two Freeride series, Dark Grey – Silver – Blue
Frame: 21.5″ Frame. 18.5 in aluminium frame Giant 49 CMS frame
25″ Wheel. 26″ x 1.95 tyres/wheels
21/24 gears/24 speed shimano 8SIS gears.
Full Suspension (Front & Rear) RST Front Forks
Quick release Wheels and Saddle
Torque Bar on Handlebars. Alloy Pedals. GEL Fusion Padded saddle cover. V. Brakes. Travis X Handlebars.
Dia Compe VC757 brakes
Suntour DC80 magnesium front shocks

Box three:

Giant box three freeride series. A grim survivor from the late 1990s when frame experimentation was king! Although it looks like a full sus, it’s actually a hardtail
SRAM 5.0 twistgrip groupset.
RST forks.
Vbrakes.
21.5 inch frame.

Box shock:

Hard tail Aluminium 6061 box frame
DC 7500 Front suspension
21 Shimano gears (SRAM grip shifters & Derailleur)
SR Suntour XR20 Crank
26 inch wheels (quick release)
New Schwalbe Landcruiser fast rolling cross tyres (new inner tubes)
Suspension seat post

COMMON FAULTS

Unfortunately there was a common design fault with the Giant Box One. It would generally last one or two years then the frame would crack. My personal Giant Box One had this problem and I have seen many more examples with the same issue. Once this happens it is a write off.

articlesgiantboxonefault1
Giant Box One Common Fault
articlesgiantboxonefault2
Giant Box One Common Fault

GALLERY

Giant Box One - Blue and Yellow
Giant Box One – Blue and Yellow
articlesgiantboxoneblue2
Giant Box One Blue – yellow
articlesgiantboxoneblue3
Giant Box One Blue – yellow
articlesgiantboxoneblue4
Giant Box One Blue – yellow
articlesgiantboxoneblue5
Giant Box One Blue – yellow
articlesgiantboxoneblue6
Giant Box One Blue – yellow
articlesgiantboxoneblue7
Giant Box One Blue – yellow
articlesgiantboxoneblue8
Giant Box One Blue – yellow
articlesgiantboxoneblue9
Giant Box One Blue – yellow
articlesgiantboxoneblue10
Giant Box One Blue – yellow
articlesgiantboxoneblue11
Giant Box One Blue – yellow
articlesgiantboxoneblue12
Giant Box One Blue – yellow
articlesgiantboxoneblue13
Giant Box One Blue – yellow
articlesgiantboxoneblue14
Giant Box One Blue – yellow
articlesgiantboxoneblue15
Giant Box One Blue – yellow
articlesgiantboxoneblue16
Giant Box One Blue – yellow
articlesgiantboxoneblue17
Giant Box One Blue – yellow

Giant Box One Freeride Series Mountain Bike Red Black Frame

Giant Box Two Blue, Dark Grey, Silver Frame
Giant Box Two Freeride Series Mountain Bike Blue, Dark Grey, Silver Frame

Giant Box Two Freeride Series Mountain Bike Gold, Yellow, Pink Frame Only
Giant Box Two Freeride Series Mountain Bike Gold, Yellow, Pink
Giant Box Two Gold, Yellow, PinkGiant Box Two Freeride Series Mountain Bike Gold, Yellow, Pink
Giant Box Two Freeride Series Mountain Bike Gold, Yellow, Pink
Giant Box Two Gold, Yellow, PinkGiant Box Two Freeride Series Mountain Bike Gold, Yellow, Pink
Giant Box Two Freeride Series Mountain Bike Gold, Yellow, Pink
Giant Box Two Gold, Yellow, PinkGiant Box Two Freeride Series Mountain Bike Gold, Yellow, Pink
Giant Box Two Freeride Series Mountain Bike Gold, Yellow, Pink
Giant Box Two Gold, Yellow, PinkGiant Box Two Freeride Series Mountain Bike Gold, Yellow, Pink
Giant Box Two Freeride Series Mountain Bike Gold, Yellow, Pink
Giant Box Two Freeride Series Mountain Bike Gold, Yellow, Pink 18.5 Inch Frame Size
Giant Box Two Freeride Series Mountain Bike Gold, Yellow, Pink Back of Frame Aluminium 6061
Giant Box Two Freeride Series Mountain Bike Gold, Yellow, Pink Suspension

Giant Box Three Freeride Series Mountain Bike Blue, Light Blue, Purple Frame

giant box shock freeride series bike

Back To Top

Runescape – Dungeoneering Prestige Explained

I just learned this by reading up on it a bit today. Prestige is xp given to you in your base xp for dungeoneering. It is kind of tricky to understand at first but this is what I grasped off it.

Prestige is an xp given to you per floor you are doing. If you have done that floor already you will not get prestige xp the next time you do that floor, so you get his xp only once. The more floors you do the higher the xp will be given per floor done (not per higher floor number, its total floors.) It was set up this way so people didn’t grind the same floor over and over for XP.

Method of getting max prestige xp. Start at floor one and work your way through the floors. You will get prestige xp per floor done. Upon reaching the highest numbered floor you can do (example lvl 6) go back out and using your ring reset it(you won’t lose floors unlocked or complexity.) Upon reseting go to floor one and work your way down again. This way you will get max xp from prestige and your base xp. This means more xp for ya.

I hope this helps some. And if you have any questions i’ll try to answer them.

RS Dungeoneering prestige link and faq http://www.runescape.com/kbase/guid/dungeoneering_faq

Runescape – Guide to Crafting Air Battlestaffs

What you (basically) need:

-Battlestaff
-Sand
-Seaweed
-Cosmic, astral, fire runes
-Access to Lunar Spellbook

Gathering Supplies

Battlestaff

Zaff’s Staff shop (Varrock Diaries)
A certain number can be bought from Zaff for 7k each, depending how much of the Varrock Diaries you’ve completed, a maximum of 64 each day wearing Varrock armour 3, resetting at 1am BST

Baba Yaga’s shop (Lunar Diplomacy)
Baba Yaga on Lunar Isle also has a few battlestaffs for sale, but check as you buy them as they start at 7k but rapidly increase in price. Remember your seal of passage!

Mage Training Arena (Decent magic level)
A time consuming way of getting them, but is cheaper than buying on GE while training up magic. Battlestaffs cost 1 Telekinetic, 2 Alchemy, 20 Enchantment and 2 Graveyard pizazz points.

GE/RSOF
The Grand Exchange is a most convenient place to buy everything, but battlestaffs have a limit of 100 every 4 hours, if you are constantly crafting them you should try looking over the forums for people selling bulk amounts.

Sand

Bert’s daily sand (Hand in the Sand)
You can get 84 sand a day from Bert in Yanille, resetting every 24 hours. They are delivered straight to your bank.

Zanaris sandpit (Lost City)/Yanille sandpit
The sandpit in Zanaris is the closest to a bank but not often used because of the random events in Zanaris which can slow you down. Many people prefer using the one in yanille. A way of gathering sand very quickly is to move you house to Yanille, get some house teleports and dueling rings. Teleport to your house, go out and fill up your buckets. Use a BoB too if you like. Once filled, teleport to Castle Wars to bank.

GE
Buckets of sand at the Grand Exchange has a limit of 10k every 4 hours.

Seaweed

Arhein’s daily seaweed
You can buy 80 (noted) seaweed from Arhein in Catherby for 2gp each, he only restocks 24 hours after you have bought the last of the seaweed.

Piscatoris seaweed nets (Swan Song)
There are 2 nets that catch seaweed at the north-east corner of Piscatoris that respawn fairly quickly and is close to the bank.

Entrana
The best alternative for quest noobs people that can’t get into Piscatoris, because now there’s a deposit box at the Port Sarim docks! There are 8 spawn points at the North-west end of the island. No armour/weapons are allowed on Entrana, it’s easier just to wear wight-reducing items so you can run longer.
*Note that I haven’t actually tried this since the deposit box, so I don’t know if weight reducing items are needed*

GE
Seaweed at the Grand Exchange has a limit of 10k every 4 hours.

Runes

Either buy them or craft them yourself. The Grand Exchange has a limit of 25k runes every 4 hours.

Making Air Orbs

Firstly, make sure you are on the Lunar spellbook. Grab an air staff, fire and astral runes for however many casts of Superglass Make you want. Withdraw 13 buckets of and and seaweed and cast. This gives you 130 crafting exp and 78 magic exp per inventory. the buckets will be destroyed but you will get an extra 0-10 molten glass per inventory (about 33% overall).

Craft the glass into unpowered orbs with a glassblowing pipe (spawn at Entrana),giving 52.5 exp per orb.

Then switch back to normal magic to enchant the orbs. Start at Edgeville. Equip an air staff, a charged glory and some light armour. Bring and 27 unpowered orbs and 81 cosmic runes (3x cosmics for each orb). Run to the air obelisk through Edgeville Dungeon and enchant.
*The air obelisk is in the wilderness, so watch out for revanants that may climb up the ladder.*
When finished, use your glory to teleport back to Edgeville. Using BoBs is recommended to charge more than 27 per glory charge, especially if you only have a few.

Then just attach the powered orbs onto the battlestaffs for epic amounts of experience. =)
You can either sell or alch the finished staves.